 |
| |
Click here to Print |
| |
 |
| |
Click here to Print |
| |
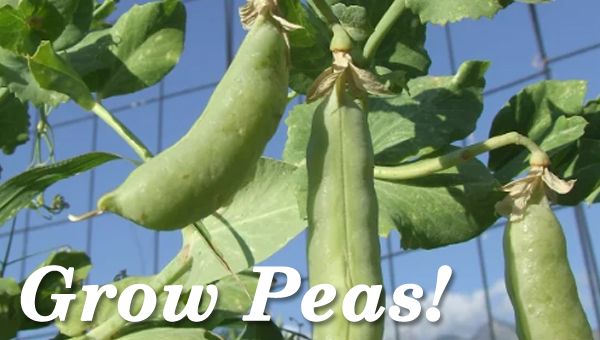 |
Peas are a wonderful addition to any garden. They grow quickly, require little room, and are a tasty snack or addition to basically any dish. Peas are legumes, meaning they help fix nitrogen levels in your soil. This is why they are a great companion crop in any vegetable garden.
There are many different varieties, which fall into two main categories, snap and shelling peas. The snap varieties, such as sugar snap and snow peas, have an edible outer husk.
Shelling peas should have the husks removed, but generally have plumper peas inside. There are also "sweet peas" that are inedible (and a different genus), but are prized for their beautiful and fragrant flowers.
Peas are a vine, so they will need some support. You can use sticks "planted" among the peas, strings hung from above, or let them grow up tomato cages or trellising. You'll need to train them up a little, but they'll do most of their climbing on their own.
Each plant has a short producing season, so you'll want to plant 10-20 every week or two to stretch out their availability. My favorite strategy is to stick an empty tomato cage in an open spot in the garden.
Plant 10-15 seeds spread out 2-3" from each other all around and inside the circle made by the feet of the cage. I place them on the ground and push them down to the first joint on my pointer finger, give them some water, and then loosely cover the holes with some dirt.
Most varieties start producing at around 70 days. Pick them regularly to keep the plants producing longer. Once they stop flowering, pull them out and plant a new batch. Try growing a few varieties to find out which you like best, and remember to keep replanting regularly to keep them in your kitchen all summer long.
|
| |
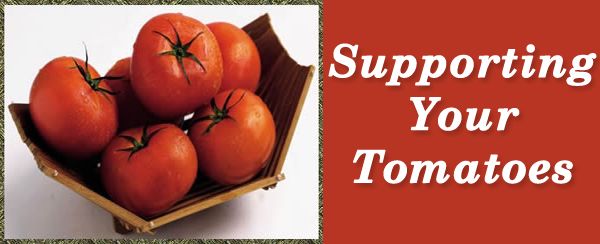 |
Late May is a great time to plant tomatoes and pole beans. These vegetables are tiny when we buy them or start them from seed, but will soon be in great need of some structural support.
Those of us who have been growing vegetables for years have tried many different types of supports with varying success. Let's look at some of the old standbys and suggestions to make them work effectively for you.
But first, we want you to consider size control on your tomato plants. What do we mean? Left to their own, some tomato plants, or vines actually, will grow and grow to a size no structure can hold.
Before that happens to you, consider one of the best ways to control the size.
As your tomato plant grows to a 2-3 foot height, look at its structure. You will notice that supplemental branching sprouts from leaf axial areas. You can control the size of your plant by removing some (or all of them, if you like) of this secondary branching. Some tomato growers highly recommend this technique; others suggest moderation. We are simply suggesting that removing some of them will keep your plant size under control.
You don't have to remove all of them, but you can. You can also eventually "top" your tomato plant, too. Both techniques will offer size control. However, both techniques will also limit the degree of fruiting. On the plus side, this method will keep your tomato plant at a size manageable for you and your plant structures.
Tomato cages ...you know the kind that I mean. They are funnel shaped and made from thick wire. They come in several different sizes, starting with one that is only about two feet tall. Of course, tomato plants don't usually stop growing at that height.
So this size will work with young plants that need early support, but they are not meant to last for the entire season, especially with indeterminate tomatoes that become exceptionally large.
Once that small tomato plant that you purchased in a 4-inch pot grows into a 2-foot plant, it is time to add the largest of the tomato cages, the one that is 4-5 feet tall. You don't even have to remove that first small cage, necessarily.
But your growing plant will need this further support, that is for sure. If you have chosen to remove a portion of your tomato plant through thinning and/or topping, these cages should work just fine. Be sure to be gentle when installing and slowly work the cage around the plant so you don't break branches off.
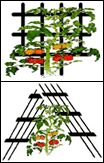
Trellis structures are great for tomatoes, not just the flowering vines in your perennial gardens. Yes, you can grow tomatoes by espalier. Not only are they sturdy structures, they are esthetically beautiful, too. As your tomato grows, offer support to the branches by tying them to the trellis.
To minimize the weight of the plant, you may need to employ the "thinning" technique (removal of some of the axial branching). The trellis can be placed up against a wall for support. You can also take two trellises and form a trellis "A-frame."
Plant the tomato in the middle and as it grows, you have trellis support on both sides of the plant.
Once you've put your trellis or cages in, make sure to check your plants regularly. Gently work branches through to higher supports to allow the plant room to grow, and and to prevent breakage. You'll be picking tomatoes before you know it.
|
| |
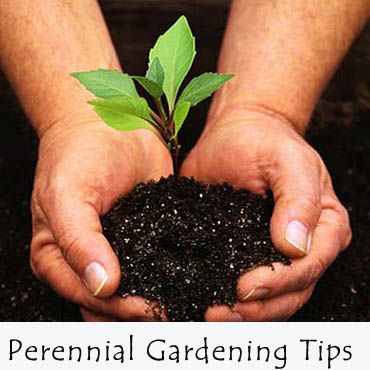 |
When planting a new garden, perennial or otherwise, get ready to get your hands dirty! Yes, you will need to prepare the soil. Before putting all your new plants into the ground, this is your best opportunity to loosen the soil, break up the clumps (especially if you have clay soil), and remove rocks. Next, add organic matter by mixing a good amendment together with your native soil.
This is the perfect time, prior to planting, to add in an organic starter fertilizer. Be sure to work rock phosphate or some other source of phosphorus down into the root zone.
Phosphorus, an essential nutrient required by plants, is primarily responsible for healthy root development and fruit and flower production. This nutrient does not move well in the soil, so now is the time to put it where it is needed.
Few gardeners pay attention to the pH level in their perennial garden. Though most perennials prefer a pH of about 6.5, some, including dianthus, salvia, linum, and gypsophila, have a distinct preference for more alkaline soils. Others prefer a more acidic soil. If you are interested in the pH of your soil, do a soil test before you begin.
We sell pH kits. and the test is very simple to do. Your soil is an entire complex ecosystem below ground, with possible variability in the pH within only a few feet. So check random areas of your new flowerbed to obtain a complete "pH picture" of the soil. If your soil is highly acidic (below 6.0) or highly alkaline (above 7.0), you may need to consult with us about pH adjustors to add to the garden before your planting.
Keep newly transplanted perennials watered for the first few weeks. Water deeply to saturate the entire root ball and establish good contact between the roots and the surrounding soil.
It is during this time period that you might not see much above-ground growth. Know why? Because the roots of the new plantings are busy getting established. This is a good thing. No need to fertilize beyond that starter fertilizer--not yet, anyway!
Once your new plants are carefully planted: Mulch, Mulch, Mulch. That's right, put a 2-3 inch layer of garden mulch, small bark or forest products, cocoa mulch or shredded leaves around them. This will blanket the soil and keep the newly planted roots warm, as well as help with moisture maintenance and keep weeds to a minimum.
As your new perennial flowerbed begins to grow and bloom, bloom and grow, then you will know it is a good time to feed with. This will help to promote good plant health and increased blooms.
Sick plants attract bugs like a magnet. If your plants look stressed during the growing season, or if you see disease or insect damage, feed your plants with a quick-release organic fertilizer (try a blend of seaweed and fish emulsion). If this doesn't help, begin again with a new plant. Your garden will thank you!
Perennials last for a number of seasons, but they don't last forever. Some may seem to want to last forever, but they have lost their beauty. If a plant performs poorly, try moving it to a different location. If it still is not happy, send it to the compost pile! Since there are so many outstanding perennial plants to choose from, you should not make do with poor performers.
When designing a perennial garden, think about how you will be able to access your plants to weed, deadhead, or divide them.
Perhaps your bed is narrow (up to 3 feet), in which case, you can reach from the edge of the garden without a problem for these chores.
If your garden is wider than this, plan a way to access your plants without trampling them and compacting your soil around the plants. This may mean a stepping stone path through the middle, or at least to those unreachable plants. Created at the back of a border, a walkway will be hidden during the growing season, but will make the bed accessible.
And don't forget to mulch.
|
|